Brick by Brick: Crafting a LEGO MINI Tank Adventure!
Building a Lego MINI Tank is an exhilarating and captivating experience that will transport you back to your childhood days of imaginative play. This step-by-step guide will unleash your inner engineer as you construct a miniature tank using the iconic Lego bricks. With detailed instructions and stunning visuals, you will be amazed at the level of intricacy you can achieve with these tiny building blocks. From the sturdy chassis to the rotating turret, every aspect of this tank is meticulously designed to ensure a realistic and functional model. Challenge your problem-solving skills as you navigate through each construction phase, and witness your creation come to life in your hands. Whether you are a Lego enthusiast or simply seeking a fun and rewarding project, Building a Lego MINI Tank is the ultimate adventure that will leave you inspired and eager to tackle your next Lego masterpiece.
Video Source : Brick Experiment ChannelBuilding a Lego MINI Tank
| Step | Description |
|---|---|
| 1 | Select the right Lego pieces |
| 2 | Start with the base of the tank |
| 3 | Attach wheels or tracks for mobility |
| 4 | Construct the main body of the tank |
| 5 | Add a rotating turret |
| 6 | Install a cannon or gun |
| 7 | Include additional details like antennas, hatches, or lights |
| 8 | Customize the tank with camouflage or decals |
| 9 | Test the tank’s functionality and playability |
| 10 | Show off your creation and engage in imaginative play! |

Building a Lego MINI Tank
For Lego enthusiasts and military history buffs alike, building a Lego MINI Tank can be a fun and rewarding project. With its small size and intricate details, this miniature tank is sure to impress. In this article, we will guide you through the process of building your very own Lego MINI Tank, from gathering the necessary pieces to adding the finishing touches.
Gathering the Pieces
Lego building is all about having the right pieces to bring your creation to life. When it comes to building a Lego MINI Tank, you will need a specific set of bricks to accurately replicate the design. Start by gathering the following pieces:
– Black bricks for the tank’s body
– Gray bricks for the tank’s tracks and details
– Dark green bricks for camouflage
– Clear bricks for the tank’s windows
– Black and gray bricks for the turret and gun
It’s important to note that these are just general guidelines, and you can customize your Lego MINI Tank with different colors and details based on your preferences.
Assembling the Body
The first step in building your Lego MINI Tank is to assemble the body. Start by building the base using the black bricks, making sure to create a sturdy foundation for the rest of the tank. Then, add the gray bricks to create the tank’s tracks, ensuring that they are properly attached and can rotate smoothly.
Next, it’s time to add the tank’s body. Use the black bricks to create the main structure, ensuring that it is symmetrical and proportional. Don’t forget to leave space for the turret and gun on top of the tank. Once the body is complete, you can add the dark green bricks for camouflage, giving your Lego MINI Tank an authentic military look.
Building the Turret and Gun
The turret and gun are crucial parts of any tank, and building them accurately will add realism and detail to your Lego MINI Tank. Start by constructing the main turret using black and gray bricks, making sure it can rotate smoothly on top of the tank’s body. Then, add the gun using black and gray bricks, ensuring that it is aligned with the turret and can move up and down.
For added authenticity, you can use smaller bricks to create details such as hatches, vents, and machine guns on the turret. These small touches will make your Lego MINI Tank stand out and impress anyone who sees it.
Adding the Finishing Touches
Once the main structure of your Lego MINI Tank is complete, it’s time to add the finishing touches that will bring it to life. Start by attaching the clear bricks to create windows for the tank’s crew. This will add a sense of realism and allow you to imagine the tank’s interior.
Next, you can add decals or stickers to represent the tank’s identification numbers, unit insignia, or other markings. This will not only make your Lego MINI Tank look more authentic but also give it a personal touch.
Finally, consider adding small details such as headlights, exhaust pipes, or even foliage to enhance the overall appearance of your Lego MINI Tank. These details may seem small, but they can make a big difference in the final result.
Displaying and Enjoying Your Creation
Once you have completed building your Lego MINI Tank, it’s time to proudly display and enjoy your creation. Whether you choose to showcase it on a shelf, use it as a centerpiece for a Lego diorama, or engage in imaginative play, your Lego MINI Tank is sure to bring joy and satisfaction.
Remember, building with Lego is all about creativity, so don’t be afraid to experiment and make your Lego MINI Tank truly unique. Enjoy the process, and let your imagination run wild!
Building a Lego MINI Tank
Frequently Asked Questions
Similar Posts
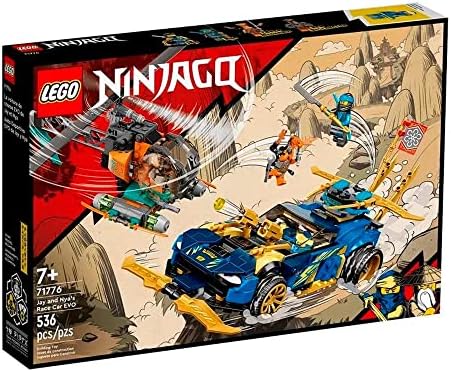
LEGO Ninjago Jay & NYA Race Car EVO 71776 Building Kit (536 Pcs)
LEGO Ninjago Jay and NYA’s Race Car EVO 71776 Building Kit is an exciting building kit that consists of 536 pieces. This set allows you to construct Jay and NYA’s futuristic race car, which is equipped with awesome features and details. The kit includes minifigures of Jay and NYA, along with their weapons for epic…
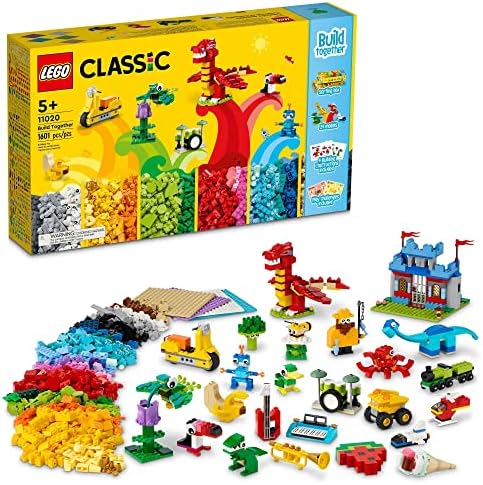
LEGO Classic Build Together: 1,601 Pieces for Kids 5+!
The LEGO Classic Build Together 11020 Creative Building Toy Set is a fantastic choice for kids, girls, and boys aged 5 and above. With a whopping 1,601 pieces, this set provides endless opportunities for creativity and imagination. Whether they want to build a towering castle or a futuristic spaceship, this set has it all. The…
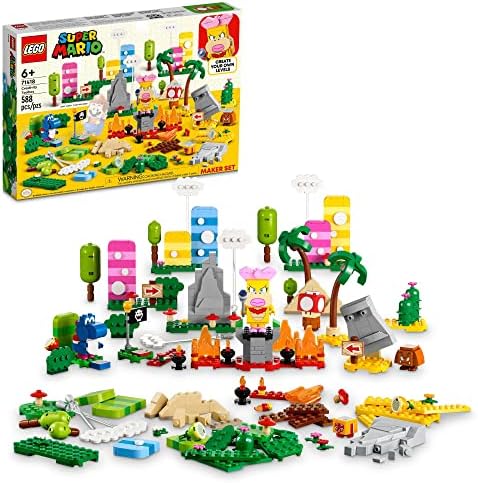
Build Your Own LEGO Mario Levels: Figures, Builds & More!
LEGO Super Mario Creativity Toolbox Maker Set 71418 offers limitless possibilities for kids aged 6 and above to unleash their creativity and imagination. With this set, they can design and build their own personalized levels using the included figures and various themed builds such as grass, desert, and lava. The set also includes a Starter…

LEGO NINJAGO Lloyd and Arin’s Ninja Team Mechs: Epic Christmas Gift for Ninja Fans (Ages 9+)
The LEGO NINJAGO Lloyd and Arin’s Ninja Team Mechs 71794 Building Toy Set is the perfect gift for Christmas for teen boys, girls, and kids ages 9 and up who love ninja adventures. This set includes 2 impressive mechs and 5 minifigures, allowing kids to create their own action-packed scenes. With realistic details and movable…

Ultimate LEGO Spider-Man: No Way Home Set – 3 Spidey Variants!
The LEGO Marvel Spider-Man Final Battle 76261 Building Toy Set is a must-have for fans of the iconic web-slinger. This Marvel collectible is based on the exciting climax of the highly anticipated Spider-Man: No Way Home movie. With the Multiverse Marvel Playset, kids and collectors can recreate epic battles and embark on imaginative adventures. The…
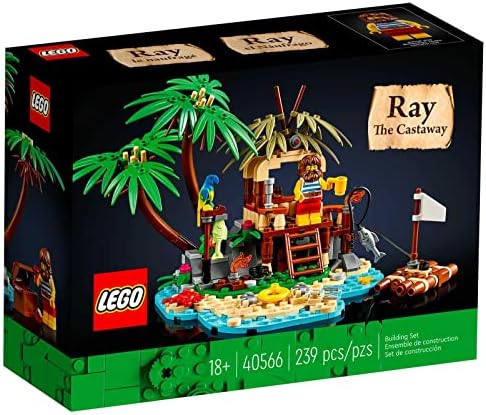
2022 LEGO Ray The Castaway (40566) Kit: Unleash Your Creativity!
LEGO Lego Ray The Castaway (40566) Building Kit 2022 is an exciting new addition to the LEGO collection. This building kit offers a unique and adventurous experience for LEGO enthusiasts. With its vibrant colors and intricate details, it captures the essence of a castaway’s journey. The set includes a minifigure of Ray, the castaway, along…