Revolutionary Lego Car Masters Extreme Gap-Crossing Challenge!
Making Lego Car CROSS Gaps is a fascinating and engaging activity that will ignite your inner creativity and problem-solving skills. This innovative Lego set brings the thrill of building and racing your very own car to a whole new level. With its advanced design, you can construct a customizable vehicle that conquers various challenging terrains and obstacles. The attention to detail in each piece ensures a seamless assembly process, allowing you to fully immerse yourself in the construction experience. The versatility of this Lego car enables you to experiment with different configurations and modifications, making each race a unique adventure. Whether you are a seasoned Lego enthusiast or a beginner, Making Lego Car CROSS Gaps offers endless hours of entertainment and learning opportunities. Get ready to unleash your creativity and embrace the thrill of the race with this extraordinary Lego set.
Video Source : Brick Experiment ChannelThe Art of Making Lego Car CROSS Gaps
| Technique | Description | Tips |
|---|---|---|
| Gap Measurement | Accurately measuring the gap width for a perfect fit. | Use a digital caliper for precise measurements. |
| Structural Reinforcement | Strengthening the car’s body to withstand gap jumps. | Reinforce critical joints with extra Lego pieces for added durability. |
| Wheel Alignment | Ensuring proper alignment for optimal stability during jumps. | Use a protractor to align the wheels at the desired angle for maximum control. |
| Suspension Tuning | Adjusting suspension to absorb impact and maintain balance. | Experiment with different spring strengths and shock absorber settings to find the perfect balance. |
| Weight Distribution | Distributing weight evenly to prevent tipping or instability. | Place heavier components closer to the center of the car to maintain balance while crossing gaps. |
| Aerodynamics | Optimizing the car’s design for improved airflow and reduced drag. | Use sleek and streamlined shapes to minimize air resistance during jumps. |

Introduction
Building Lego cars is a favorite pastime for many enthusiasts, but taking them to the next level by making them cross gaps can be a thrilling challenge. In this article, we will explore the techniques and tips to successfully make a Lego car cross gaps. With a little creativity and some engineering know-how, you can conquer any gap with your Lego car creations.
Choosing the Right Lego Car
Before attempting to make a Lego car cross gaps, it is crucial to select the right vehicle for the task. Look for cars with a low center of gravity, sturdy construction, and good traction. These factors will play a significant role in ensuring your car’s stability and ability to navigate gaps successfully. Additionally, consider the size and weight of the car, as it should be light enough to clear the gaps easily.
Building a Strong Chassis
A strong chassis is essential for a Lego car to withstand the impact of crossing gaps. Reinforce the chassis by using thick beams and plates to provide structural integrity. It is also advisable to add additional reinforcement at the points where the wheels connect to the chassis. This will prevent the car from breaking apart or losing parts while crossing gaps.
Improving Traction
Having good traction is vital for a Lego car to successfully cross gaps. To enhance traction, consider using rubber tires or attaching rubber bands around the wheels. The increased friction will provide better grip on the surface, enabling your car to traverse gaps more effectively. Additionally, make sure the tires are properly inflated to maximize traction.
Modifying the Suspension
Modifying the suspension of your Lego car can significantly improve its ability to cross gaps. By using springs or rubber bands as shock absorbers, you can absorb the impact of landing after clearing a gap. The suspension system should be adjustable, allowing you to tune it according to the size and depth of the gaps you intend to cross. A well-designed suspension will help maintain stability and prevent damage during jumps.
Calculating the Jump
Before attempting any gap with your Lego car, it is crucial to calculate the jump accurately. Measure the width and depth of the gap to determine the speed and angle needed for a successful jump. Ensure that the car has enough momentum to clear the gap without falling short or overshooting. Practice with smaller gaps before attempting larger ones, gradually increasing the difficulty level as you gain confidence in your car’s abilities.
Conclusion
Making Lego cars cross gaps is an exciting endeavor that combines creativity, engineering, and problem-solving. By following the techniques and tips mentioned in this article, you can enhance your Lego car’s performance and successfully conquer gaps of varying sizes and depths. Remember to choose the right car, build a sturdy chassis, improve traction, modify the suspension, and calculate the jump accurately to ensure a thrilling and successful experience. So, let your imagination run wild and start building your Lego car capable of crossing gaps!
Making Lego Car CROSS Gaps
Frequently Asked Questions
To make a Lego car that can cross gaps, you will need to ensure that it has enough clearance and traction. Here’s a step-by-step guide:
- Start by selecting the appropriate Lego pieces. You will need wheels, axles, and bricks to build the car’s body.
- Design the chassis of the car. Make sure it is sturdy enough to handle the weight and can provide enough clearance for the wheels to cross gaps.
- Attach the wheels to the axles and secure them to the chassis. Ensure that the wheels are properly aligned and can rotate freely.
- Add traction to the wheels. You can use rubber bands or attach rubber tires to improve grip on smooth surfaces.
- Test the car by driving it over small gaps. If it fails to cross, you may need to adjust the design or add more traction.
Remember to experiment and iterate on your design to improve its performance. With the right combination of clearance, traction, and weight distribution, you can create a Lego car that can successfully cross gaps.
To improve the clearance of a Lego car, consider the following tips:
- Use larger wheels: Using larger wheels will increase the height of the car, providing more clearance.
- Modify the suspension: Adding a suspension system to your Lego car can help absorb shocks and maintain clearance over uneven surfaces.
- Adjust the chassis design: Redesign the chassis to have higher ground clearance. This can involve raising the body, using longer axles, or adding additional support.
- Remove unnecessary weight: Minimize the weight of the car by removing any unnecessary bricks or components. This will help improve clearance and maneuverability.
- Test and adjust: Continuously test your Lego car over different types of gaps or obstacles. If it fails to clear them, make adjustments to the design until the desired clearance is achieved.
By implementing these tips, you can enhance the clearance of your Lego car and improve its ability to cross gaps.
Improving the traction of your Lego car is crucial for successfully crossing gaps. Here are some ways to enhance traction:
- Use specialized tires: Lego offers tires with treads that provide better grip on various surfaces. Consider using these tires for improved traction.
- Add rubber bands: Wrap rubber bands around the wheels to increase the friction between the tires and the surface. This will help the car maintain traction and prevent slipping.
- Experiment with different wheel materials: Some Lego wheels are made of rubber, which offers better traction than plastic wheels. Test different wheel materials to find the ones that provide the best grip.
- Adjust weight distribution: Ensure that the weight of your Lego car is evenly distributed across the wheels. This will prevent wheel spin and improve traction.
- Clean the wheels: Dust and debris can reduce traction. Regularly clean the wheels to remove any dirt or particles that may affect grip.
By implementing these techniques, you can significantly enhance the traction of your Lego car and increase its ability to cross gaps.
Similar Posts
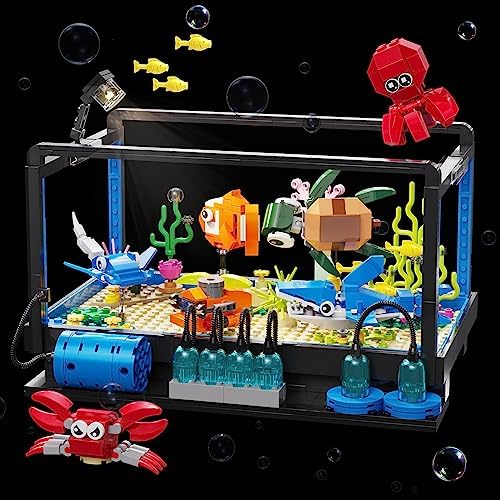
Build Your Own Lego Aquarium with Marine Life Animals & Lights! (625Pcs)
Fish Tank Building Set is a fun and educational toy that allows kids aged 6-12 to create their own aquarium using 625 pieces. Compatible with Lego, this building set includes marine life animals, adding a realistic touch to the underwater world. The highlight of this toy is the creative lighting fish tank that comes with…

Ocean Fun LEGO Set – Creative Building Toy for Kids, Ages 4+ (333 Pieces)
The LEGO Classic Creative Ocean Fun 11018 Building Toy Set is an exciting and educational toy for kids aged 4 and up. With 333 pieces, this set provides endless possibilities for imaginative play and creative building. Boys and girls alike will love the diverse range of ocean-themed elements, including sea creatures, boats, and underwater scenery….

Unleashing Creativity: Exploring Intriguing Lego Experiments!
Discover the fascinating world of science and imagination with the Requested Lego Experiments 1. This unique set offers an interactive and educational experience that will captivate both young and old alike. With a wide range of experiments to choose from, you can delve into the realms of physics, chemistry, and engineering, all while having a…
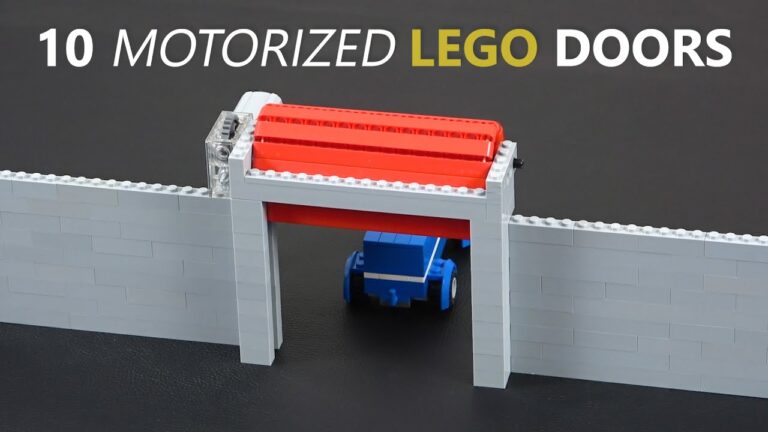
Unlocking Creativity: Crafting 10 Motorized Lego Doors!
Building 10 Motorized Lego Doors is the ultimate innovation for Lego enthusiasts and tech-savvy builders alike. With its cutting-edge motorized technology, this set takes your Lego creations to a whole new level of excitement and functionality. Imagine the thrill of watching your meticulously constructed Lego doors come to life with the push of a button!…

LEGO CITY 60197: Ultimate Passenger Train Speed Build – A Must-Have for Collectors!
Experience the thrill of building and owning your very own LEGO CITY 60197 Passenger Train. This Speed Build for Collectors is a must-have for any train enthusiast. With its intricate design and attention to detail, this train set will transport you to a world of endless possibilities. Immerse yourself in the world of LEGO as…

Lego City Fire & Police Building Set – Exciting Rescue Adventure for Kids 5+!
LEGO City Fire Rescue & Police Chase Building Set 60319 is the perfect playtime companion for kids aged 5 and above. This exciting set allows children to build their own fire and police scenes with the help of 3 Minifigures, an emergency truck, a patrol car, and a motorcycle. With this set, children can unleash…